192.168.0.1
When it comes to managing your internet connections, nothing works better than the routers and the extenders. All you need is to select the right type of device that can fulfill all the requirements of your home or workspace. You can use your router by unboxing it and plug it into a reliable power source. You will get both the varieties, like some routers will come preset for instant use, and the other need proper configuration. But you need to get aware of the fact that the present one is less than the ideal as you need to login to your router using the IP address 192.168 l 0.1. Even if the installation is done by the ISP, i.e., the internet service provider, then also you need to use the same IP at the time of login in order to make all the essential updates and adjustments.
192.168 l 0.1 Admin Login
192.168 l 0.1 Login Steps
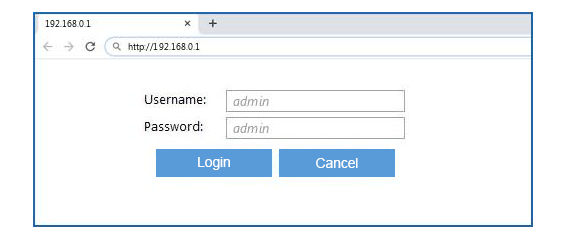
If you have a router that uses the 192.168 l 0.1 IP address, then you need to follow the below-mentioned steps to get access to the admin panel of the router.
- The very first thing that you need to check is the power supply, WAN, LAN, and WLAN lights. These need to blink out in solid green color. This means that there is no error taking place, and you can proceed. If the light turns out to be red or orange, then it means that there is some error in there.
- The next step is to open the web browser and fill in the required IP address. You can use any browser of your choice, and it needs to be the updated version. For this, you will need to enter the IP Address – 192.168 l 0.1. You might receive an error message if you don’t put the IP correctly. You need to double-check it and type in the right IP there.
- There are many users who face the issue of forgetting the username or the password. In such a case, you can easily recover that by following some of the simple instructions.
You can easily configure the router settings once you get access to the router’s admin.
Troubleshooting Tips Of 192.168 l 0.1
There can be a number of reasons why you can’t access the router. Here we have listed the most common ones that you might face along with their solutions:
Invalid IP Address:- It is not at all easy to enter the IP addresses and get to the required page. You need to enter all the digits as it is so that you can get to the right page. You will never get to the right page if you enter an erroneous digit or any unwanted character. To simplify the process, all you need is to copy and paste the IP address in the required bar.
Faulty Router:- There are high chances that your router might not work properly even after putting in the right IP address, i.e., https 192.168 o 0.1 admin. This mostly happens when you place the router in the wrong place or position. There can be many other internal or externals issues too. You need to contact the manufacturer of your router to resolve the same.
Getting Connected Easily
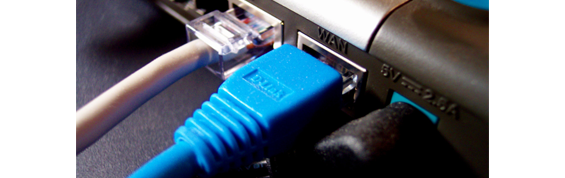
You need to follow the general instruction to install the repeater. This includes –
- Firstly, you need to disconnect the modem by switching off the power supply.
- Now connect the cable to the back of the router.
- Connect the WAN jack on the back of the wireless router.
- On the back of the router, plug in another ethernet cable and connect the same to the computer.
- Using an electrical outlet, connect the cable modem and the router.
- Turn on the power button and change the name of the Wi-Fi network.
You can start exploring further with the name of the router’s Wi-Fi network. To distinguish your network from the others, you can use the SSID or Service Set Identifier. You can set any name there as per your choice, but it should not be offensive. To differentiate your network, you need to follow some of the following steps.
- Reach out to the setup menu and click on the wireless settings option.
- Fill in the desired name of the network in the SSID field.
- Save all the changes.
You can also get to change the password at the time you are changing the name of the Wi-Fi network. You will find the password field on the same menu.
As per the information, you can easily establish the security of your router. This ensures full safety to those who are browsing the internet via your network.